Hello All! First I’d like to say Thank You for visiting my blog. This is my very first post. I will continue to post projects as I create them, so if you like what you see please check back regularly.
Here we go.
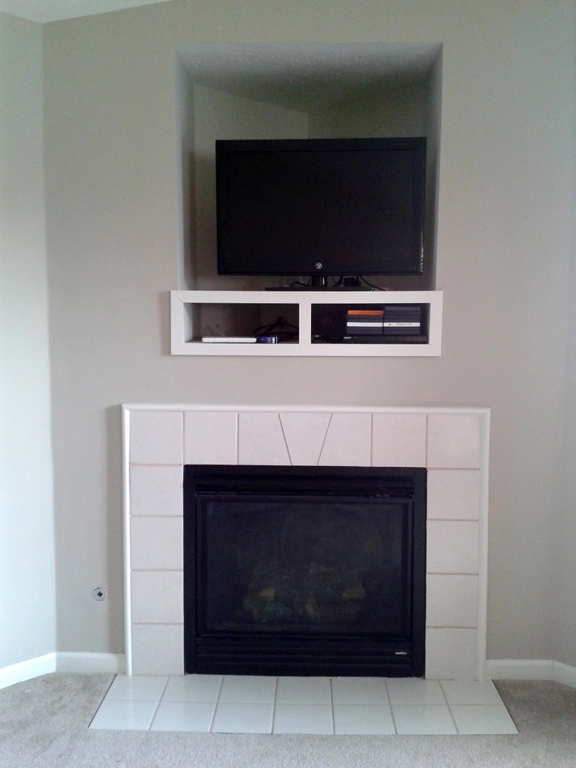
We recently move into our home, which we love, but the fireplace was an eye sore. Here you can see what it looked like when we first arrived.
A closer look at the tiles.
After some discussing with the wife, I decided to take on the project of redoing the fireplace. First thing to do was tear it out. This was surprisingly hard work.
Here is a picture of the tiles being taken out in front of the fireplace. This was by far one of the hardest parts of the whole project.
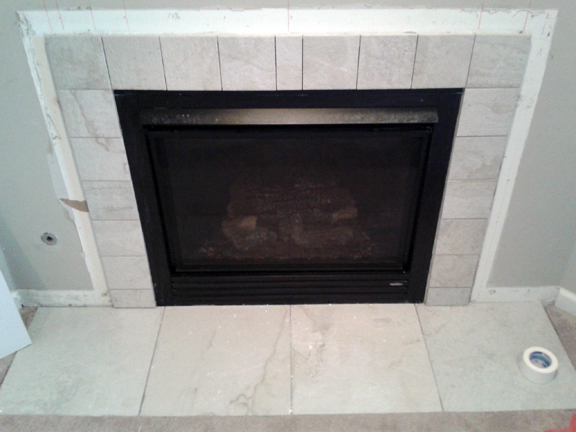
This is what it looked like when everything was removed.
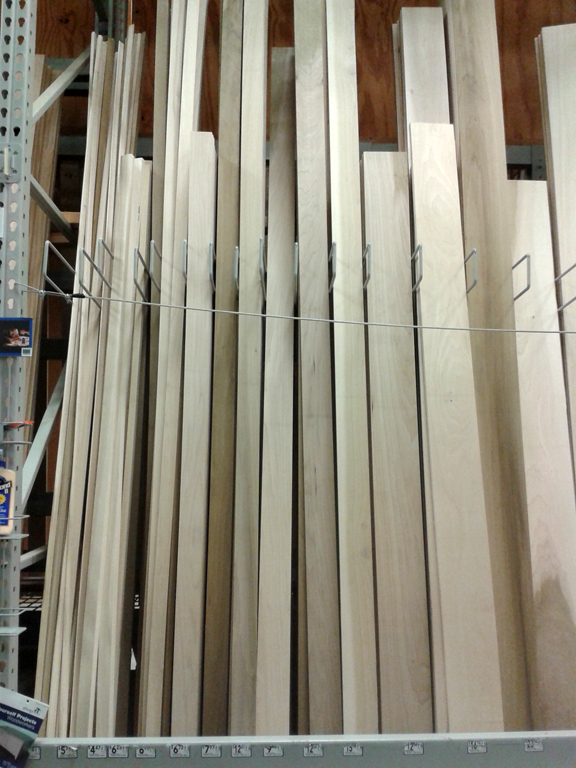
Now it was time to purchase the materials. I got everything at Lowes. It was a little pricey, so I may recommend getting your wood from a lumber yard and cutting out that middle man price jump. Learning as I go.
I decided I wanted to use Pine wood for building of the mantle.
For the tiles, I went with Ivetta White.
Here is a picture of the big tiles for the front of the fireplace
And the smaller sizes for around the fireplace.
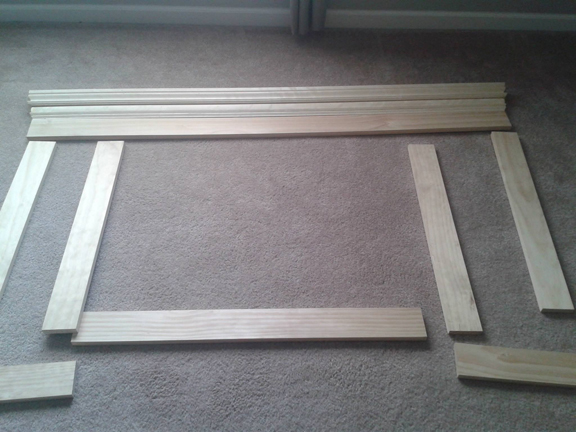
Time to start building. I had everything measured, written down, and designed out before beginning. Doing this made the building process go smoothly and fun.
Beginning Stages of the mantle.
Moving right along.
What a mess.
It took me one full day to completely build the mantle. This is towards the last stages.
Now it was time to put in the tiles.
Next I built a frame to fit inside the open area where the tv used to be above the fireplace. We decided to keep the two media component openings to give us the option to mount a tv on the wall. I needed to build a few shelves to fit inside those openings, so that it would be level with the top of the mantel. You will see those a little later.
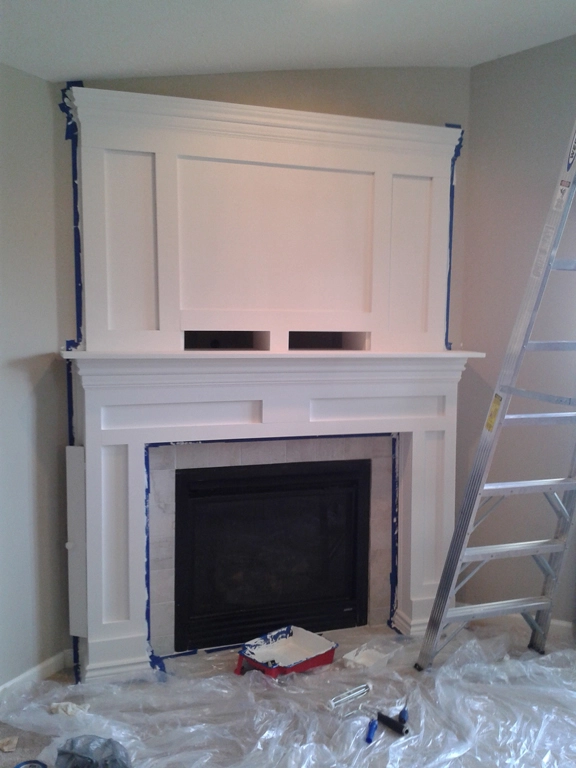
I created a door on the side of the mantel, so that I could have a way to get to the gas key whole.
A close up of the tiles.
Now it was time to do the extended top portion of the mantel.
I used construction adhesive to mount the boards to the wall. For the very top part I nailed as well as glued to the wall for best support. I mounted the mantel to the wall by ripping a board and attaching one half to the wall and the other half to the back of the mantel then attaching the two. The shelves I spoke of above are now inside the two media component openings.
Now it came time to paint. We used Valspar Ultra White Flat Interior paint (Lowes) with added primer. On the top portion we painted the walls white to give the illusion that it was part of the mantel as a whole.
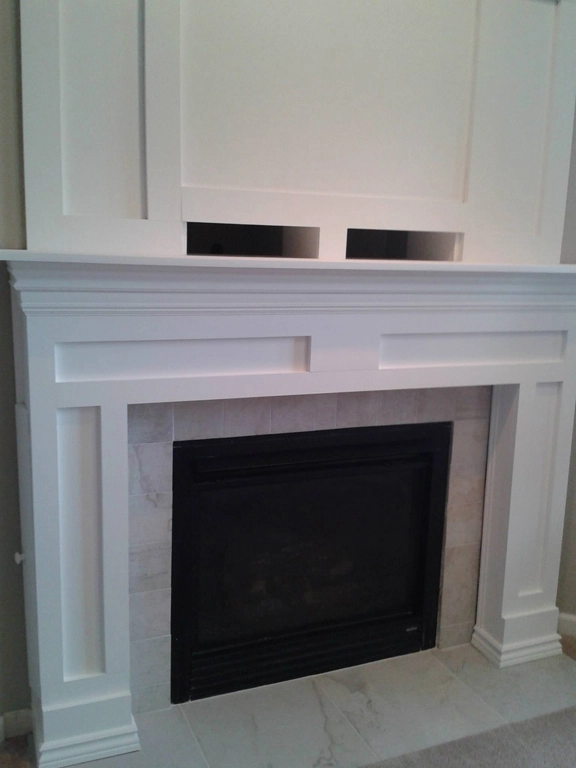
Here is what it looked like when it was complete.
I then created two doors to cover the media component openings.
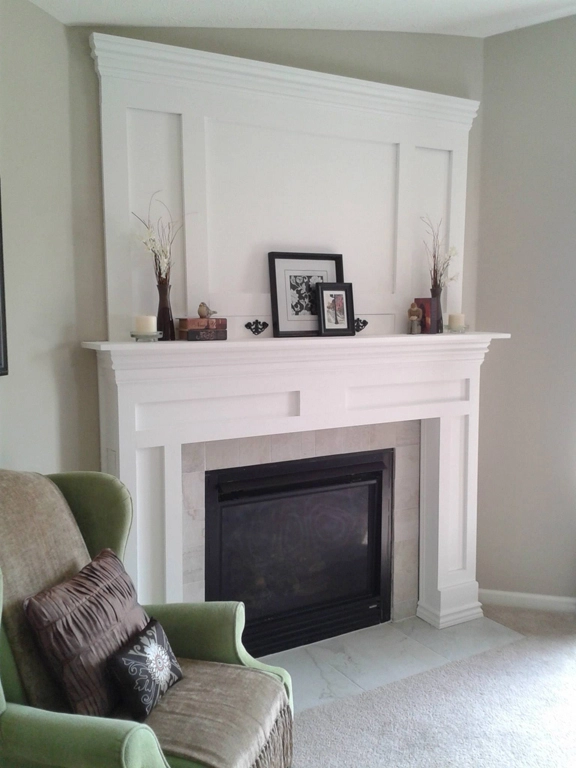
Here are some pics of the completed fireplace.
This is how we decided to display our television.
Finally here are a few bonus pics of how we will decorate for this upcoming Christmas season.
Thank you for visiting my blog and reading through this post. I hope you are inspired and would love to see some of what you all do. Cheers! Jason















Wow, Jason! Beautiful transformation! May I share your pics on Pinterest and Facebook?
Thank You Sandy! Absolutely! Share away!
Love the transformation! Would you mind sharing your plans with dimensions?
Thank You very much for the kind words. Let me see if I can locate them, and if I can I’ll post them for you.
Hello there,
Were you able to locate the plans to your build. I’d love to take on this project in my living room. I have a similar lay out with the vaulted ceiling, and I love the way your makeover turned out.
What color paint did you use? I know odd question but every time I pick a paint color out it is never right!
The brand of paint is Valspar which I got at Lowes. The color is titled “Du Jour Ultra White” swatch 7002-6 and I had it made in a flat interior finish. Hope that helps!
How many coats did it take? Did you sand it first? What kind of brush did you use?
Looks amazing! Not to mention what a handy man you are… Question. I don’t have a fireplace, but I want to build just the fireplace frame to set up on my wall as decor. Could you possibly give me the measurements you used on fireplace frame? Or wing it as much as possible? I would truly appreciate it!
Hello TLR182! I no longer have the measurements, but in your case what I’d suggest is finding what you’d like to have in the opening of your fireplace frame (decorative ideas) and measure around that. Here’s an example.
http://www.blueroofcabin.com/2011/12/christmas-faux-mantle.html
Hope that helps!
Cheers!
Beautiful! I, too, would love to know measurements.
Thank You Lisa for the Comment! The measurements will differ from each fireplace. What I would suggest is for you to measure the width and height of your fireplace opening and then develop the mantel around those numbers. Good luck and hope to see your finished project!
Cheers! 🙂
Amazing transformation! We just completed a stone fireplace makeover (that took FOREVER), so I can totally appreciate the work involved here! I love it – so custom!
Here’s a link to our makeover. Lots of work, but worth it in the end!
http://evolutionofstyleblog.blogspot.com/2013/12/diy-stone-fireplace-reveal-for-real.html
Beautiful work Jenny! You all did great! I also love the ceiling beams! Thank you for sharing! Cheers!
Beautiful! Craftmanship is top notch! Would love the measurements as well….also…keep posting would love to see more of your work! Cheers, Liz.
Thank You Liz! Id like to give you the same advice I gave Lisa above and that is measure around your current fireplace opening and work around those numbers, as they all differ. We just sold the home I created this project in and moved into a newer home about a few months ago and have a lot more projects to do, so I will be posting as I go! Thanks for following! 🙂
Awesome job. I think I may use this when redoing the fireplace in our house. Look forward to seeing what other projects you have in store in the future. It’s nice to see a DIY blog for home improvement projects from a guy!
Thank you sir! I’d love to see how your fireplace mantel turns out. Keep checking back as I should have more projects in the near future. Cheers brother!
Do you have the dimensions for this project. I would like to make one just like it. love this!
Thank You Aaron for the comment! I no longer have the measurements for this specific project, but each fireplace will differ in dimension according to your specific fireplace layout! What I recommend is to measure your fireplace opening and design around those numbers. Hope that helps! Cheers and good luck!
Just wondering what you used for the face trim. Or does 1 x 2’s?
Thanks!
Love this! What did you use for the decorative wood at the very top? Is that crown or base moulding?
I am SOO excited that I found your blog! I am going to do this while my husband is in Afghanistan to surprise him and I was so worried I couldn’t take on the project! But now is it a TOTAL go! lol Thank you!
Can you share how you covered the whole where the TV insert was?
Love It!!! We too just moved into a new home with a less than desirable fireplace surround. My husband is handy and is planning on remaking our fireplace surround to dress it up. So I decided to find some ideas for him on-line. Your project gave a step by step instruction which I printed for him. Thank you for making it easy to follow. I will be watching for any other DYI projects you come up with. My husband has transformed our two bathrooms with wainscotting, new light and faucet fixtures and paint. I love them both. So glad I have a husband who can do almost anything and do it like a professional. We both enjoy transforming our homes into a home unique to our taste and it has payed off when we are ready to sell. Bev R.
love this! Any idea how much it cost?
Can you list what materials were used? Size of lumber?! Please!!!!
Wow!
I am in the process of doing an addition in my home and have had doubts about a corner fireplace… The plans make room only for a corner fireplace …. not at the center of what should be a room with a vaulted ceiling. By any chance do you have pictures of the entire space. Please share! Your design looks amazing!
How did you attach the sides? I live the lay out, and I see where you assembled the front first. So, I am curious as to how you attached the sides to the front.
Thanks
Love love love!! Do you remember what grout color/brand you used for the Ivette white tiles? Thanks!
Hi! Love your fireplace- it’s beautiful. We are looking to do something similar. Your design was well thought out- I was wondering if you knew how tall the piece or molding/trim you used? Thanks! And again- beautiful work!
Just gorgeous! I can’t wait to do a “faux” version in my beach house….adds so much architecture to a room, and I’ve been trying to find a more traditional “low country” mantle look….found it! Thanks for the inspiration! 🙂
Great Work!!! How did you connect the back part of the surround legs to the mantle? Here is a link pointing to what im talking about. I just cant seem to figure it out!
Thanks!
Question: Why did you choose to use wood instead of MDF? I have found MDF to take paint much better than wood.
100 % better. Love it.
If you use the fireplace, has it blistered or hurt the paint on the fireplace?
Really pretty fireplace.
Gorgeous job! You make it seem so easy.
Wow, this is really beautiful and exactly what I want to do with my fireplace!!! Do you still have your plans for this? I know it was a while ago, but I’ve just started to learn about working with wood and plans would really be helpful!
I know this is an older project but I just stumbled upon it now while researching ideas for our fireplace renovation and have an odd question. Ours is also on a corner and has that tricky angular area at the ceiling. I love this fireplace but wonder if you’ve ever thought “I wish I went all the way to the ceiling instead of squaring off the top.” I’m totally not knocking your choice. Its gorgeous! I just can’t make up my own mind! Any thoughts?
Have a 1923 Cracker Craftsman in Florida with a rusted out Heatilator insert. Handyman friend found me an almost new electric that fits my opening for minimal price and that he was able to fit in place. I plan to use your design for inspiration to incorporate my wide screen TV whilst retaining the ’23 design esthetic. Thank you for sharing your beautiful work.
Hi Jason,
I love your design and am looking to do something very similar to my brick fireplace. Question for you what type of molding did you use under your mantel and at the top? It doesn’t look like crown molding but I may be mistaken….its hard to tell from the photos. I am looking to do a similar layering job but due to the spacing on the sides of my fireplace would like to try and avoid crown since it comes out a fair bit and I’d like to make the sides as narrow as possible without losing beautiful details like yours has.
Thanks in advance, and thank you so much for sharing!!!!
M
wow!
Nice work,keep up the nice work. What do you charge per hour?
You are obviously not a novice at woodworking. 😃 This is just beautiful! I have been searching for the right look for my fireplace, and I think that you have provided it. Thank you for posting!!
Do you have plans for this. Step by step instructions we can follow?
Great job. I am going to try to do the same in redoing my very dated white brick fireplace. Is there any way that you could let me have further info on your dimensions and detailed plans so that I get this right? I am pretty handy but this would help a lot. You did a really nice job.
Neil Linneball at neilscience@ gmail.com. I am new to Pinterest.
Thank you
Great Job! What a difference! I guess you can tell that I really like it! ‘Have been looking for ideas to change mine and this just might be it! Thanks for sharing!
So glad to have stumbled upon this post! I love the simplicity in your narrative! It makes me want to finish reading ! I’m very busy and don’t take the time to read long blog posts… Beautiful work on your fireplace. I’m inspired! Thank you! Also there is a certain warmth that comes through your blogpost, must come from the heart. Great job!
Great work what wood did you use to make this just purchased our home and the chimney needs a makeover and this is the best I’ve found.
Jason, what a fabulous job you did! You’ve given me ideas on how to update my 70s fireplace. Thank you! How can we follow you on Pinterest?
You did an amazing job on both the mantel and fireplace. Take a look at my fireplace and let me know what it reminds you of… I plan on a simular redesign with a minor change. I plan on building my surround sound speakers into it. Bill
Sorry, but I can’t figure out how to post my pics???
Hi
Love what I did with fireplace 🙂
any chance you could list supplies such as what kind of glue etc.
I will really appreciate it.
Im in the middle of reddoing my fireplaces and hope they will look as good as your
I found your blog through Pinterest. Your fireplace turned out so beautifully! Thank you for sharing step-by-step directions. We’re going to give it a go on our new fireplace we just built in a basement we’re finishing.
Hello I love your post. What a beautiful job. I have read the comments and Understand you no longer have the measurements. However, would it be possible to send me the measurements to insert area only. We’re going g to be building one ourselves and I like the size of your insert.
Hi, I love the way this turned out. Do you happen to have instructions of how to build the mantal around the fireplace? I want to do this but a guide would help. Also, about how much did it Cost to do, if you don’t mind me asking?
WOW!!!! I know this was an old post but you did such a great job I just HAD to comment!
You took bleh and made it AH-MAZING!!!!!
Very well done. Love it.